Cranq Setup
Read This on Github
⭐ Cranq Introduction
Let's Start with the Basics of the Project
CRANQ is the low-code IDE that helps you integrate AI APIs quickly, and then create value with programmatic prompt engineering. Choose from powerful microservice connectors, add GPT-3 magic to your app, and let generative AI turn raw data, into your next business
Step 1: Renaming the Project Name
-
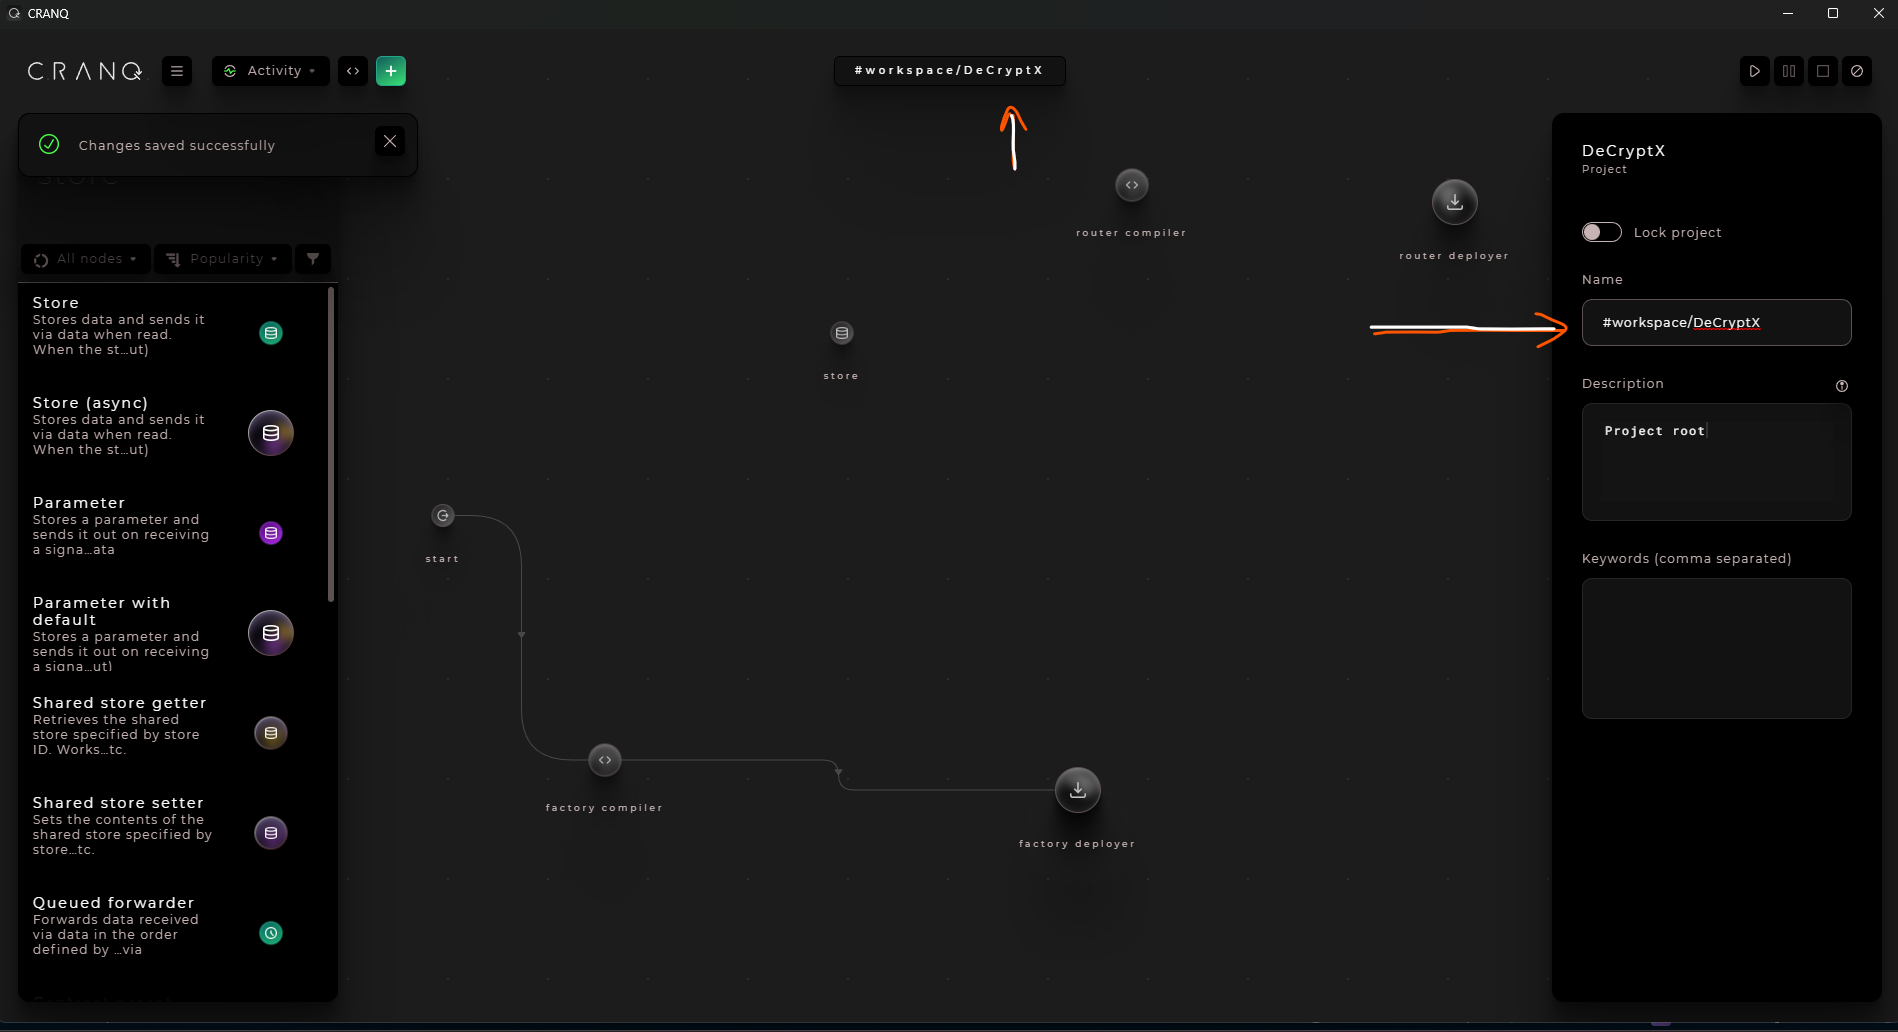
Once you load up cranq and open up your first empty project, you'll be greeted with a screen that looks something like this.
-
To get started, let's go ahead and rename our project to something like workspace uniswap underscore clone.
-
This step is helpful because it helps to keep track of the project you are working on.
Change the image size by using the click-and-scroll function.
Step 2: Introduction to Basic Cranq Functionalities
-
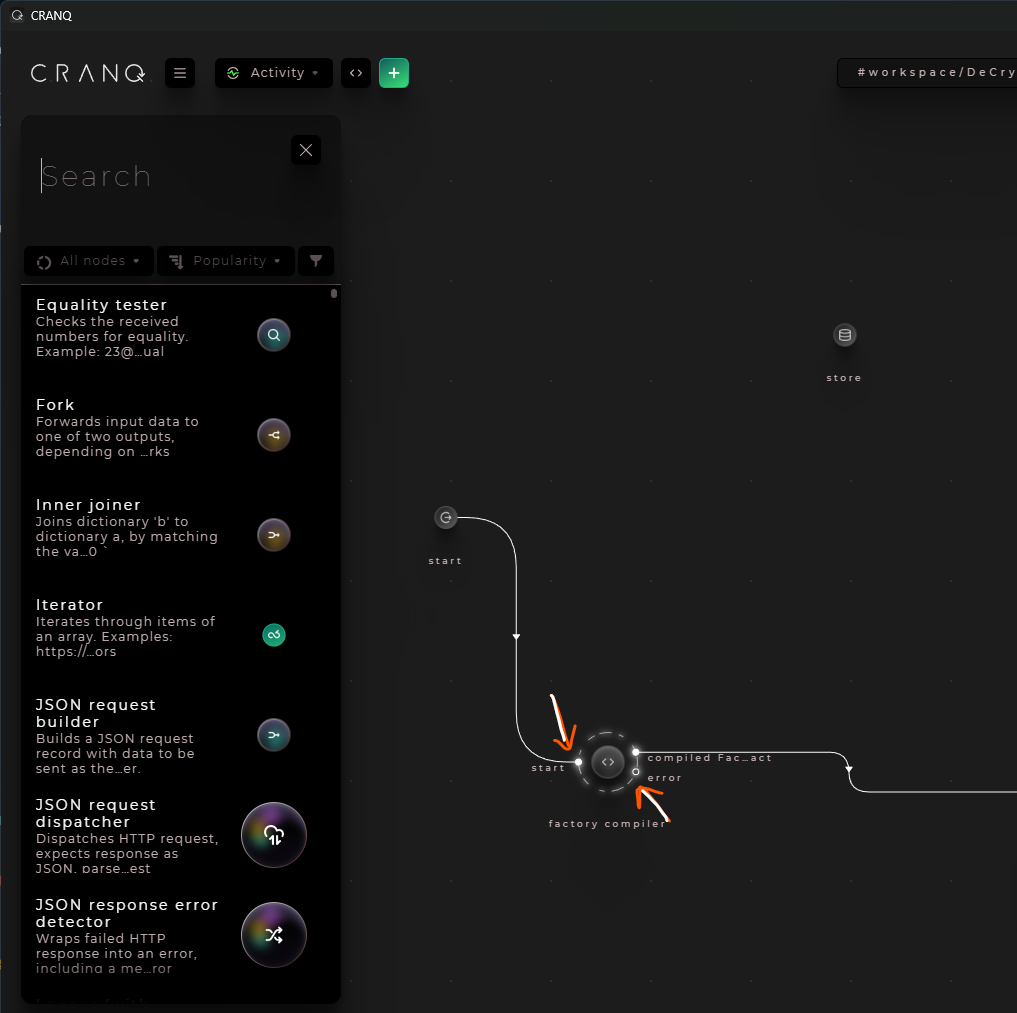
The two circles that you can see on your screen right now are called nodes.
-
Every node can have an output, as this one has right there, and they can also have inputs.
-
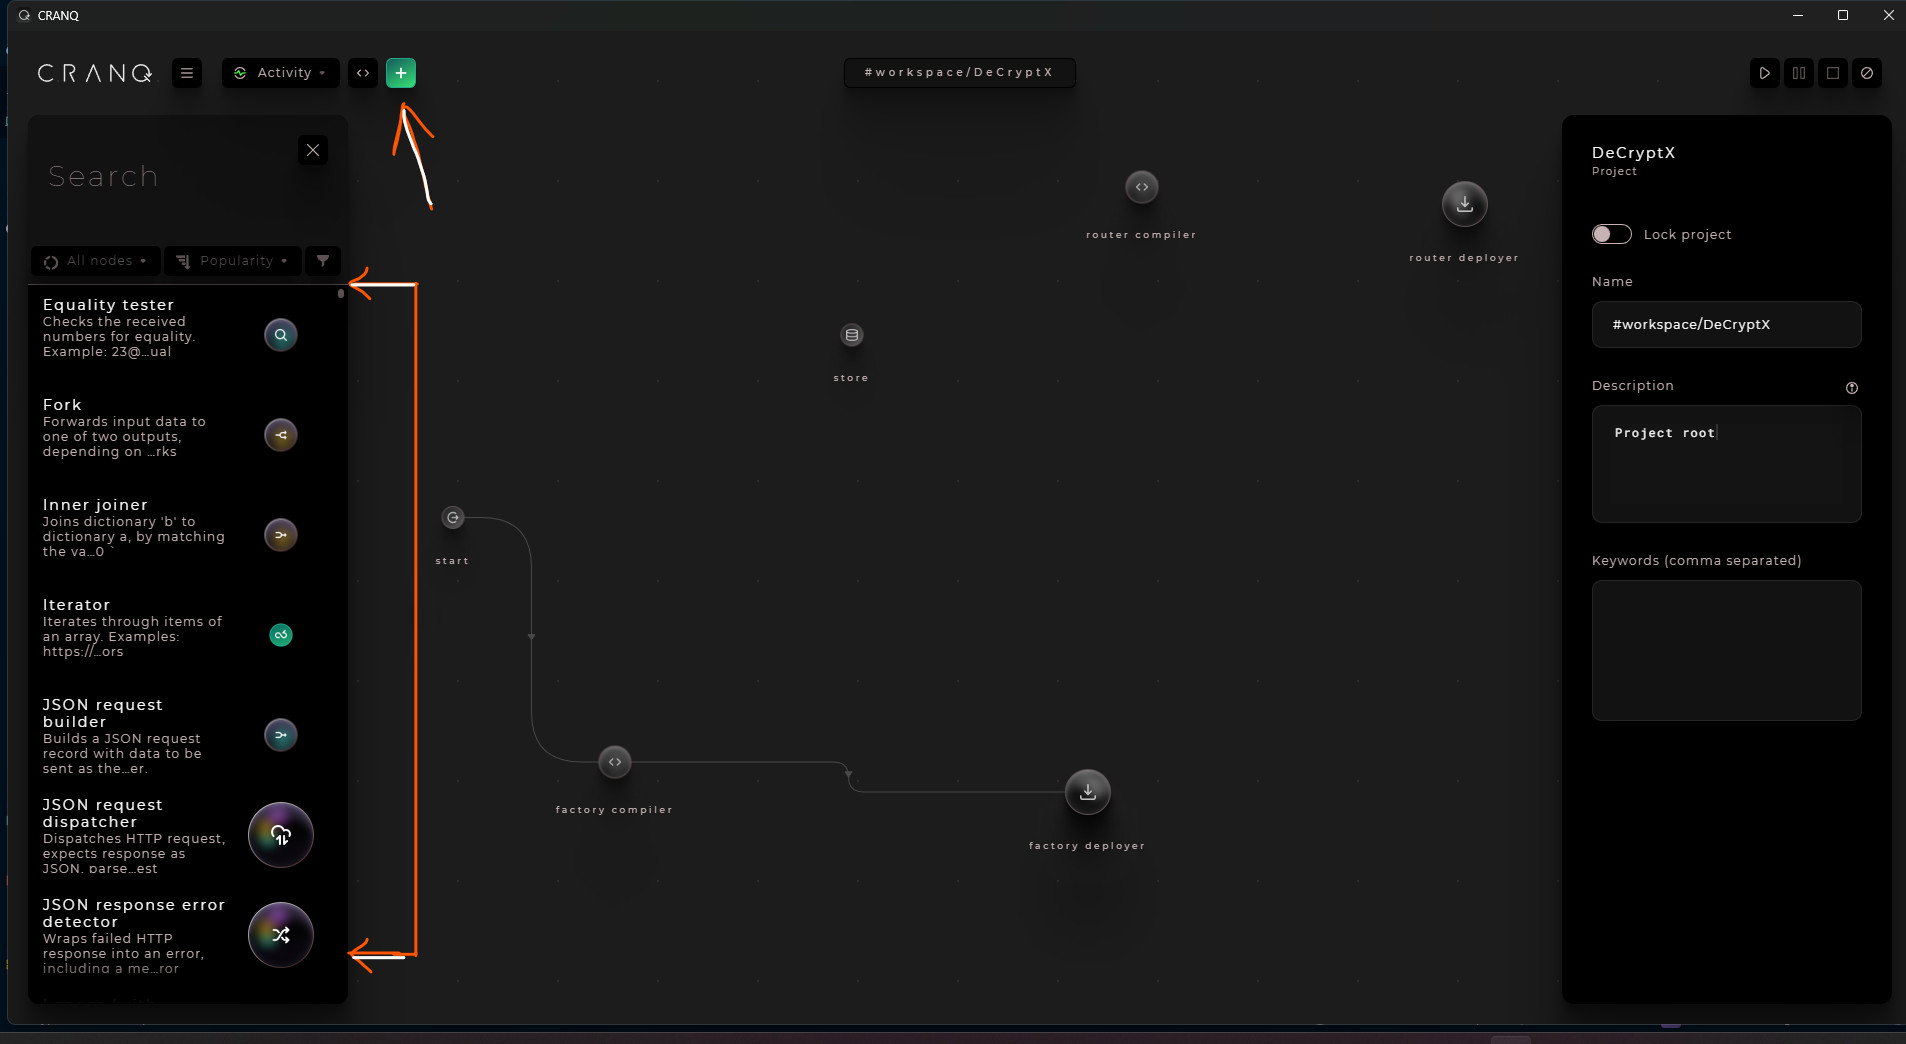
cranq also has a huge library with hundreds of different nodes that you can access simply by clicking this plus icon on top left.
-
It's helpful because it allows you to access different types of nodes quickly.
Change the image size by using the click-and-scroll function.
Change the image size by using the click-and-scroll function.
Step 3: Adding Smart Contract Nodes for Uniswap
-
In this case, we want to work on smart contracts from Uniswap, so let's search for "uniswap" in the node library.
-
As you can see, there are a lot of nodes which directly correspond to that.
-
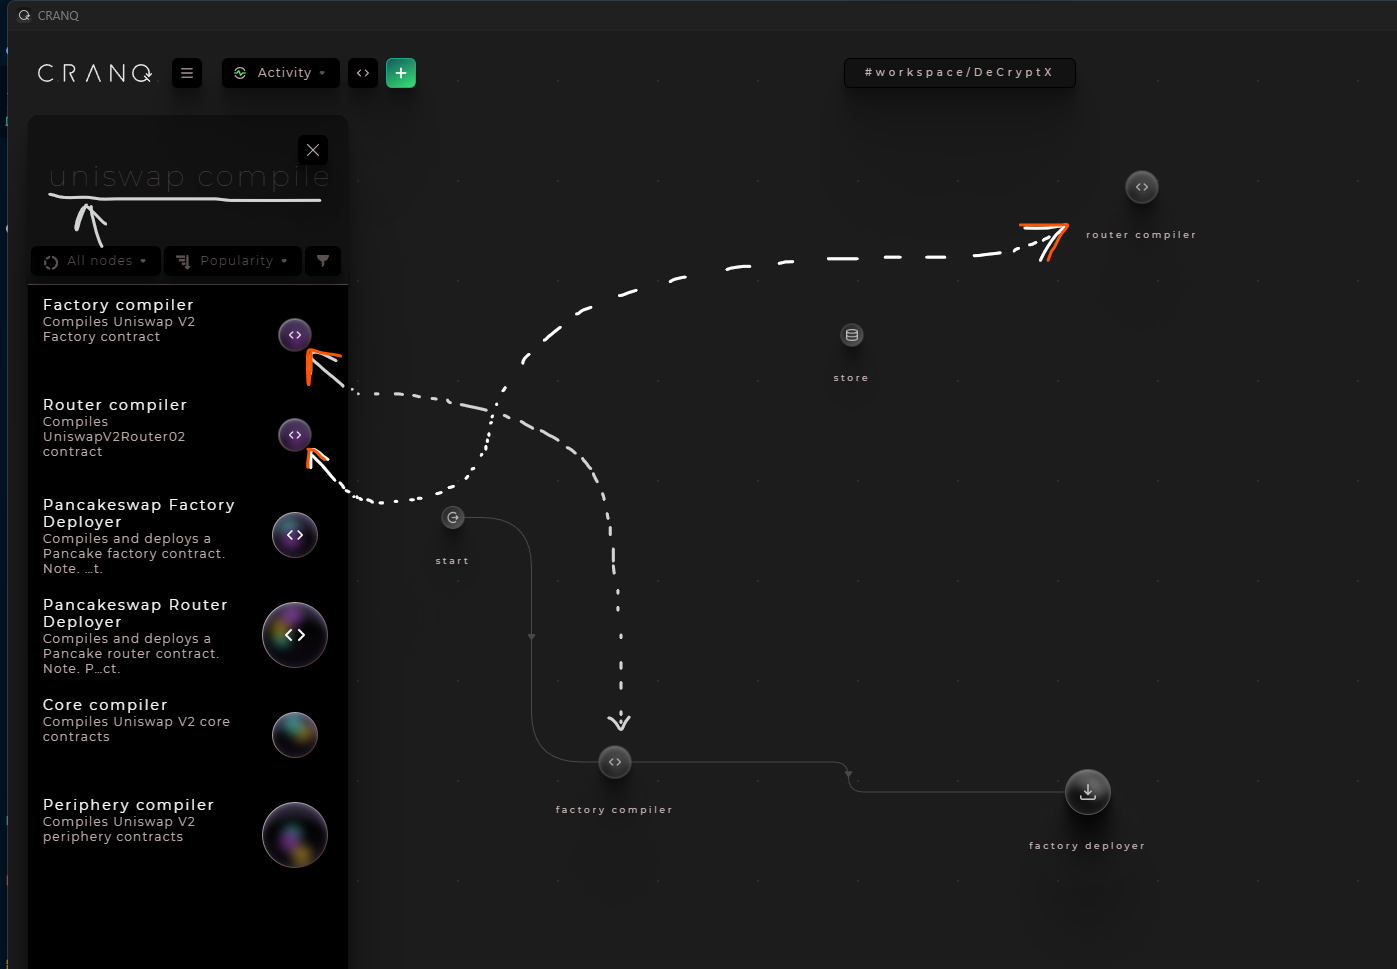
First, we want to compile a smart contract, so let's add "uniswap compile" to the search.
-
There you can see a factory compiler and a router compiler.
Change the image size by using the click-and-scroll function.
-
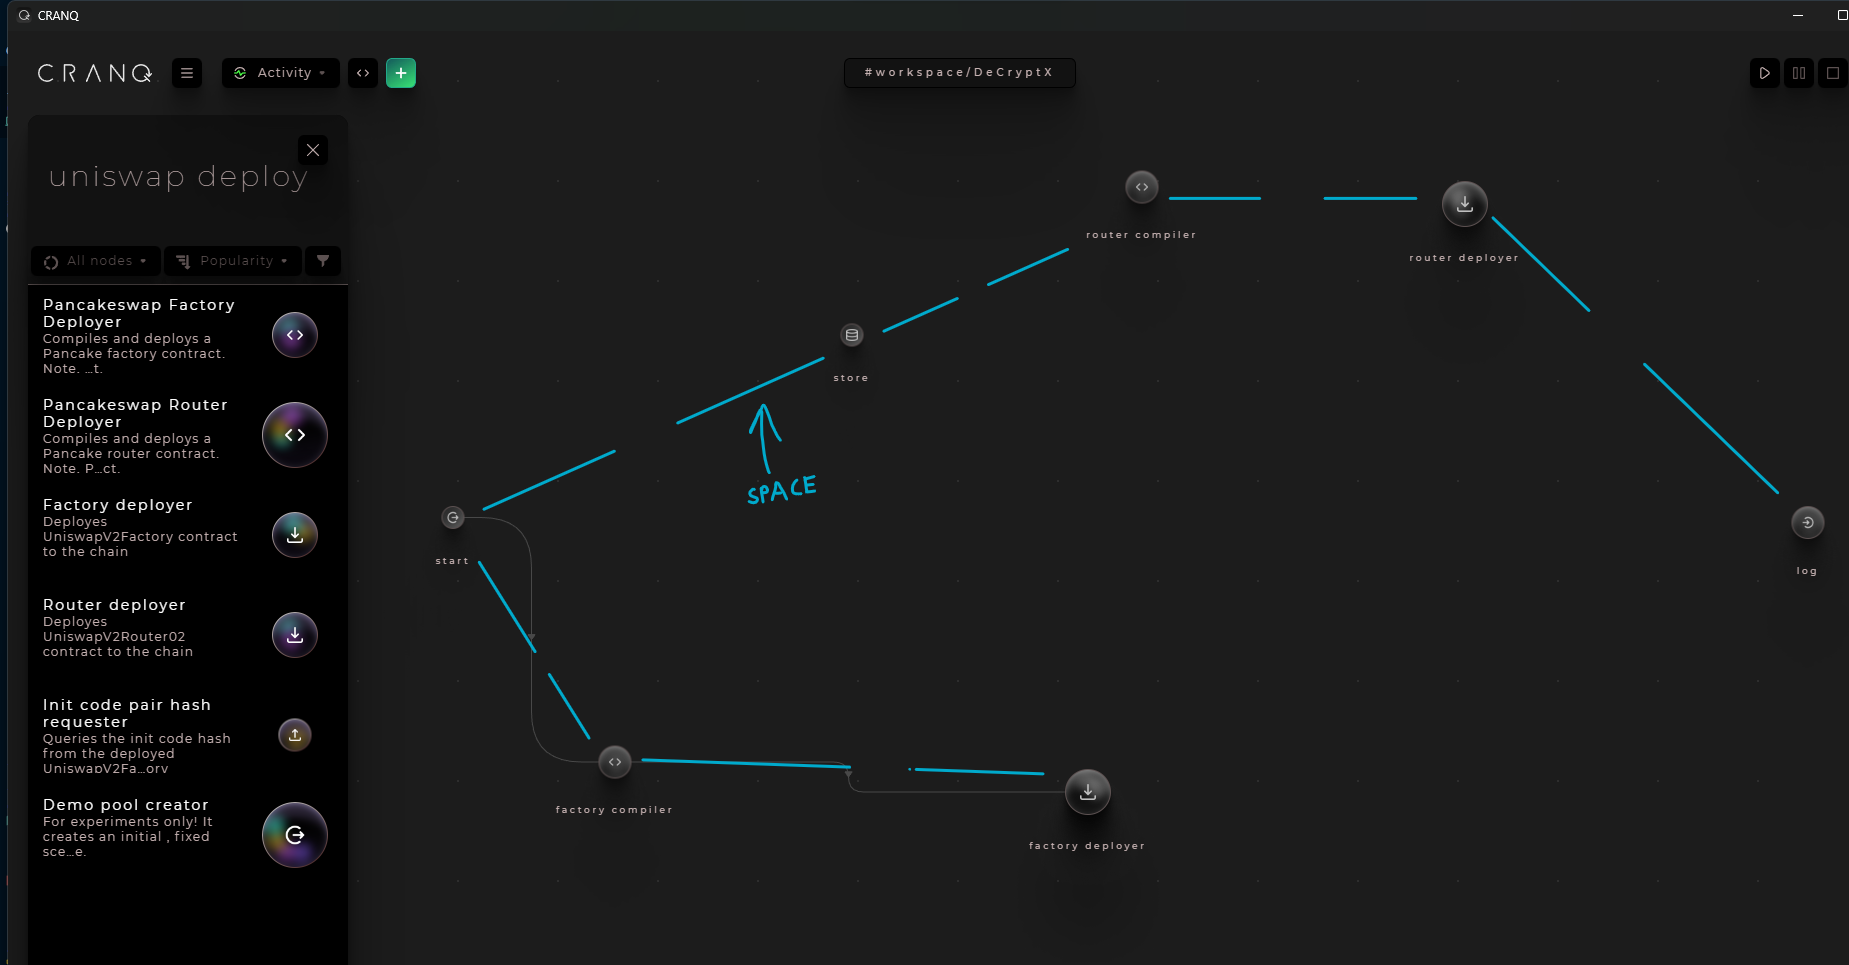
Next, we'll want to deploy these contracts, so let's search for "uniswap deploy".
-
Luckily, there is a factory deployer and a router deployer, which we're going to put right here.
Step 4: Creating Space for Work
- Let's make some room between the start and the end so we have a lot of space to work with.
- This step is helpful because it allows you to work on different parts of the project separately.
Change the image size by using the click-and-scroll function.
Step 5: Connecting the Smart Contract Nodes
-
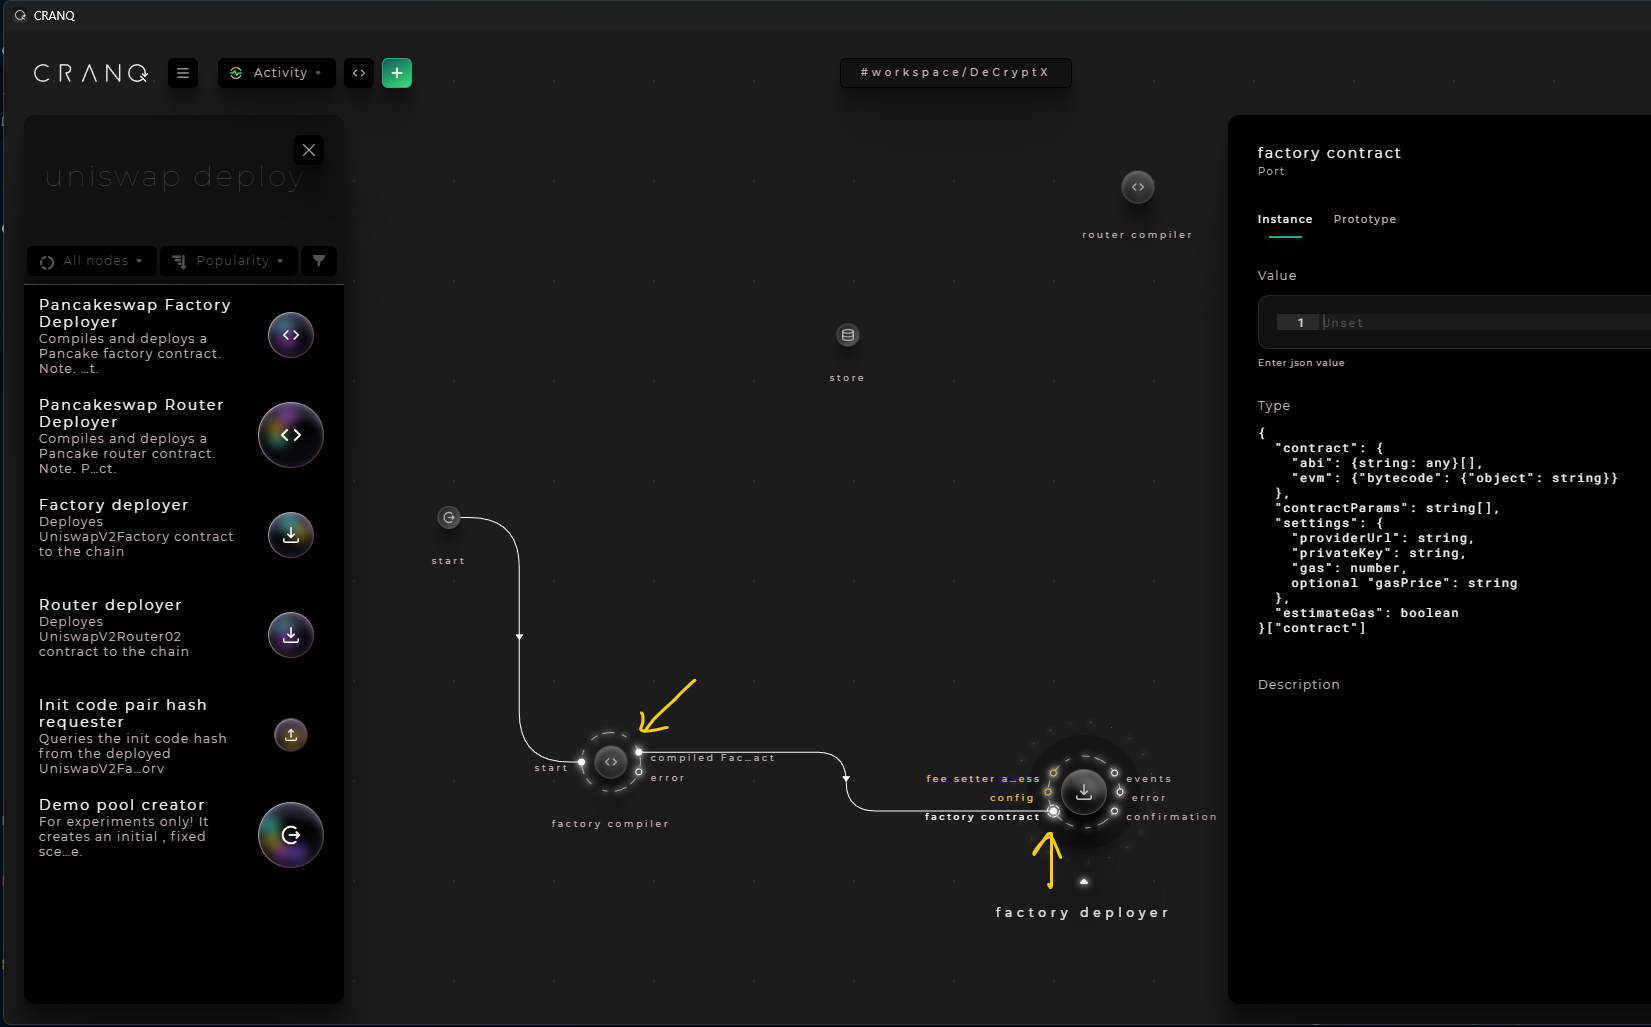
It's simple to see that we have two different pairs of nodes: the factory compiler and the factory deployer, and the router compiler and the router deployer.
-
You can hover over the factory compiler and drag its compiled factory contract over to the factory contract of the factory deployer.
-
In this step, you're connecting the nodes to establish the flow of the smart contract process.
Change the image size by using the click-and-scroll function.
Step 6: Providing Input Signals for the Nodes
-
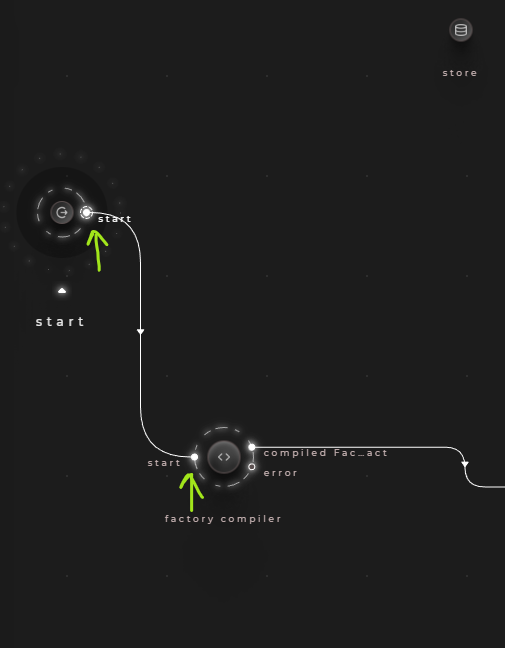
Every node in Cranq needs at least one input or one signal to start working.
-
In this case, the starting signal will be the whole start of our contract compile and deployment process, which is the green node on the left side.
-
Simply drag the start to the input signal of the factory compiler.
Change the image size by using the click-and-scroll function.
-
On the other hand, a factory deployer can have a couple of inputs, including a fee setter address (which is optional) and a config.
-
To create the config, we can create a Cranq store.
-
This step is helpful because it ensures that all the required inputs for the nodes are in place before the nodes can start working.
Step 7: Creating a Cranq Store for Config
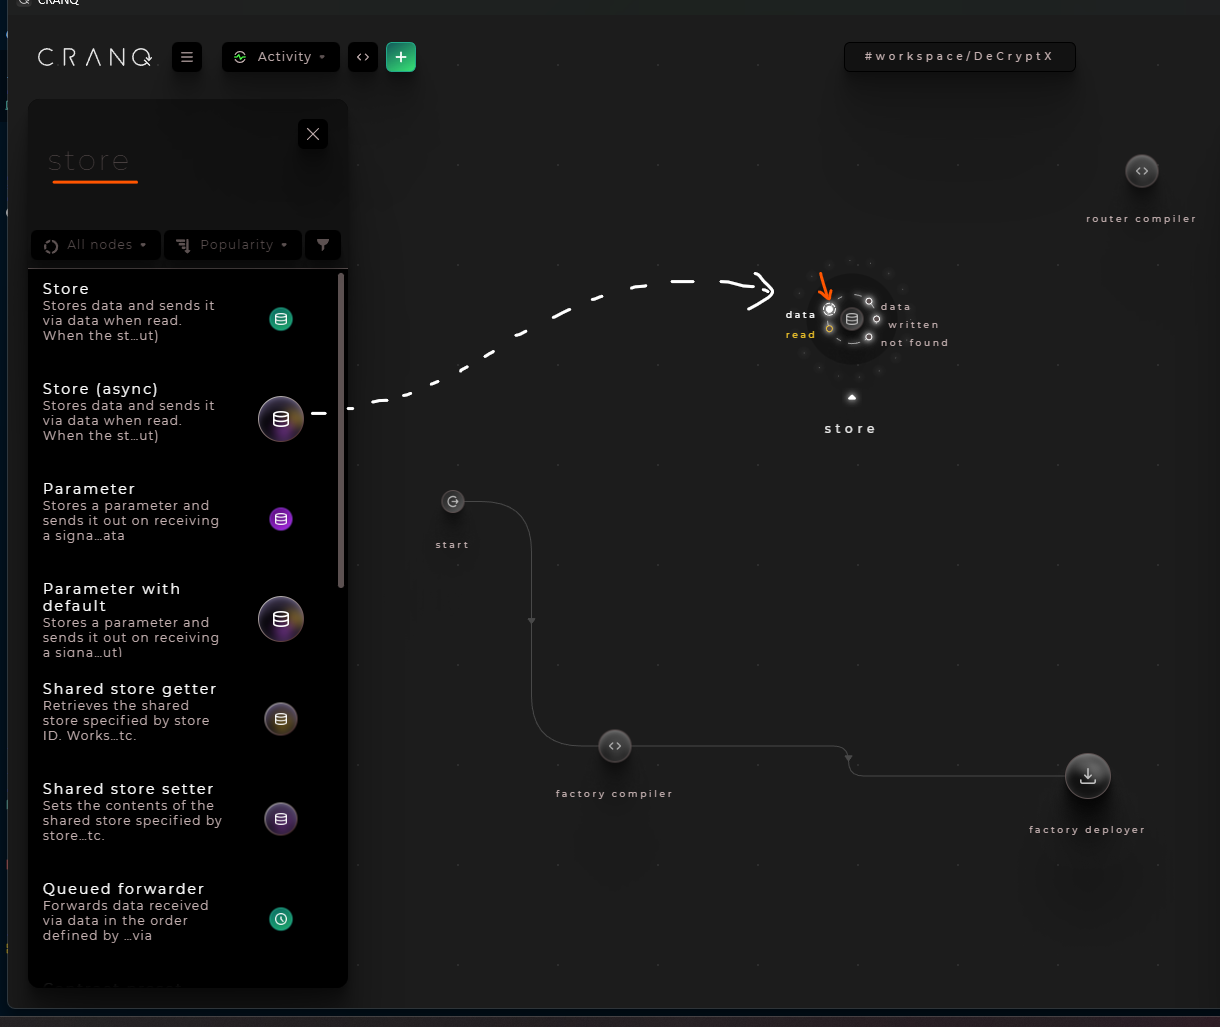
- To create the Cranq store, search for "store" in the node library.
- The store node saves variables and any other data.
- Click on the data part of the store, and in here, we can enter some values.
- This step is helpful because it allows you to store and access data needed for the project.
Change the image size by using the click-and-scroll function.
Step 8: Creating the Config Object for Cranq Store
-
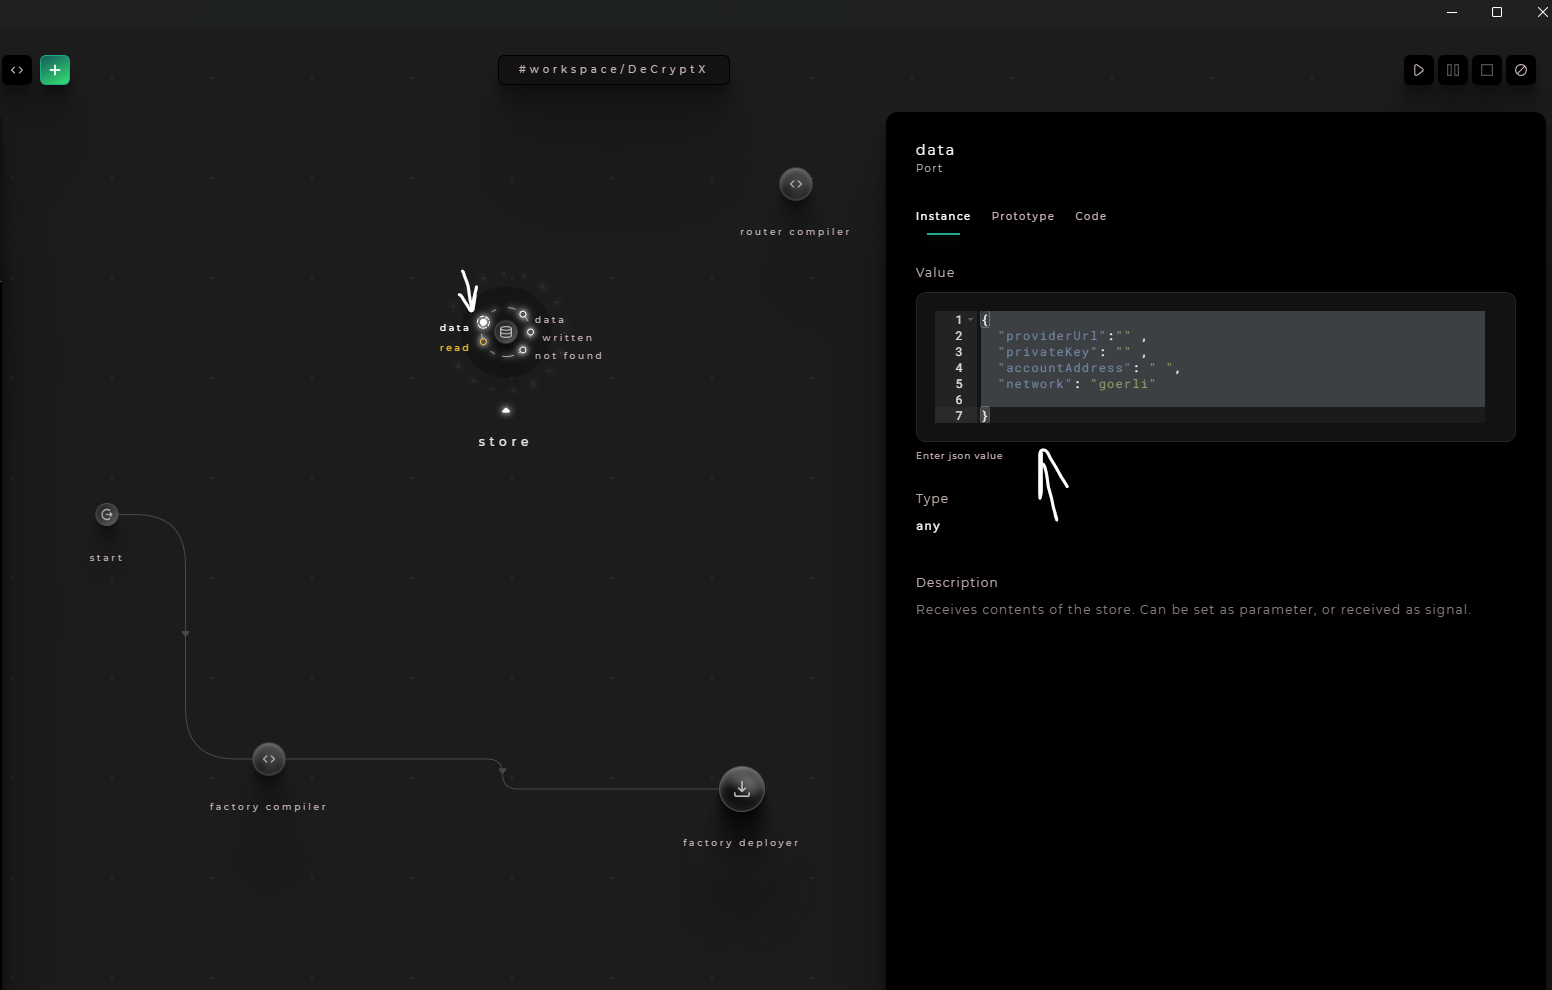
To create the config object for the Cranq store, we first need to know what has to go into it. We can click on the config input of the factory deployer node, and we'll see the type of the config object in Cranq.
-
We can copy the type and then go back to the data input of the store node and paste it there. However, we also need to add the network that we'll be using, which in this case is an Ethereum test net called
goerli.
{
  "providerUrl":"" ,
  "privateKey": "" ,
  "accountAddress": " ",
  "network": "goerli"

}-
Once we've added the network, we can replace the strings with empty strings, which we'll be able to populate with real data soon enough. Since this is JSON, we also need to remove the last comma.
-
Now we have our store set up
Change the image size by using the click-and-scroll function.
But the question is where we're going to get the data needed for this config object. In the next step, we'll learn how to get all the values required to properly compile and deploy a smart contract.
⭐ Alchemy API Key
Understanding Alchemy API Key
Alchemy is a blockchain developer platform that provides a suite of developer tools to help you build, monitor, and scale decentralized applications.
Alchemy provides a suite of developer tools to help you build, monitor, and scale decentralized applications. Alchemy’s API is a powerful tool that allows you to interact with the Ethereum blockchain through a simple and intuitive REST API. Alchemy’s API is a powerful tool that allows you to interact with the Ethereum blockchain through a simple and intuitive REST API.
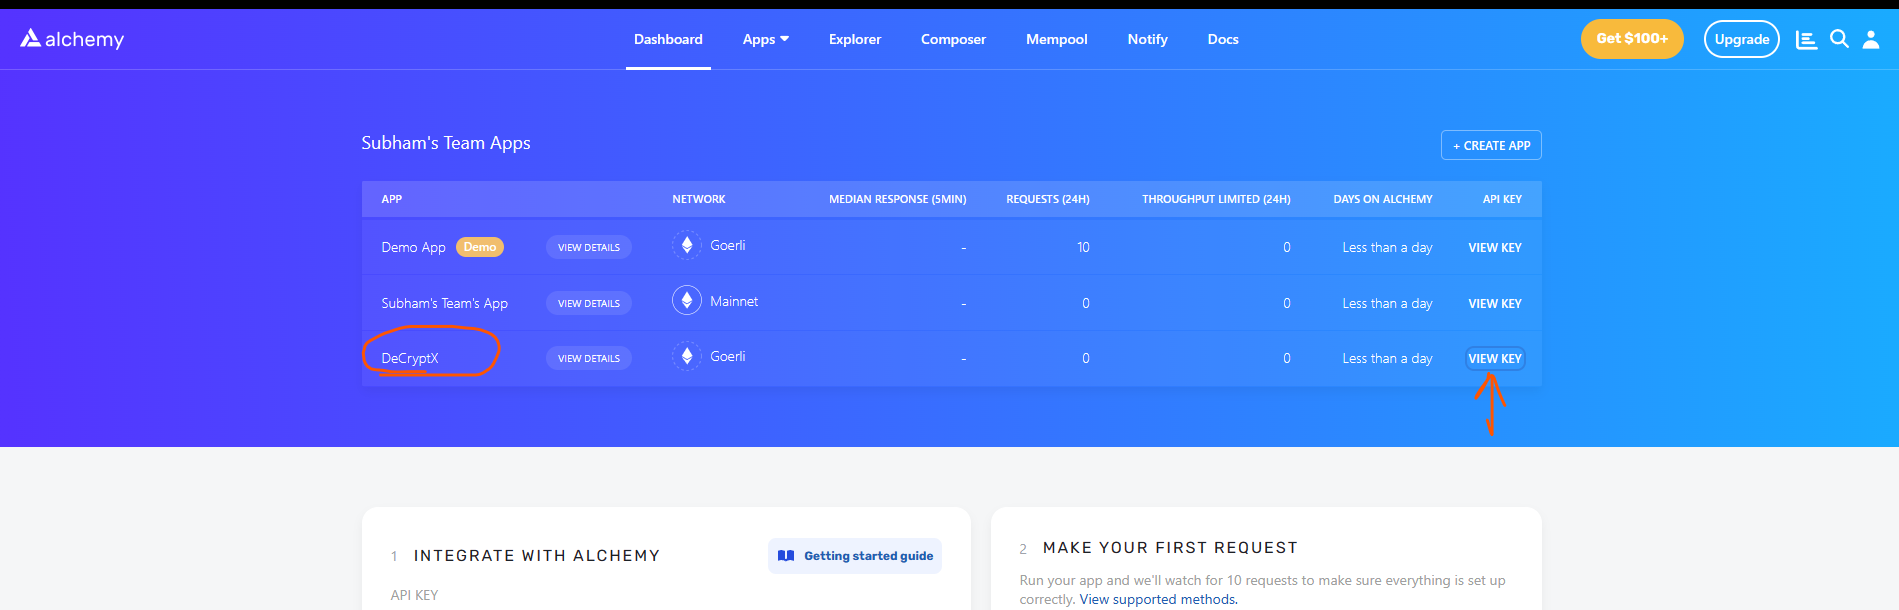
Open the Alchemy Dashboard (opens in a new tab) and make sure you are logged in. If you don’t have an account yet, you can sign up for free. Once you’ve logged in
- Step 1: Click on the “Create App” button in the top right corner of the screen.
- Step 2: Give your app a name and click “Create app”. You’ll be redirected to the app dashboard.
- Step 3: Give a description to your app
- Step 4: Choose the network you want to connect to. For this tutorial, we’ll be using the Goerli testnet.
- Step 5: Chain should be Ethereum
- Step 6: Click on create app
Change the image size by using the click-and-scroll function.
You will get API key , Htttps URL and Websocket URL . Copy the API key and paste it in the config object of the store node.

Change the image size by using the click-and-scroll function.