Post Routes
Routes with Files
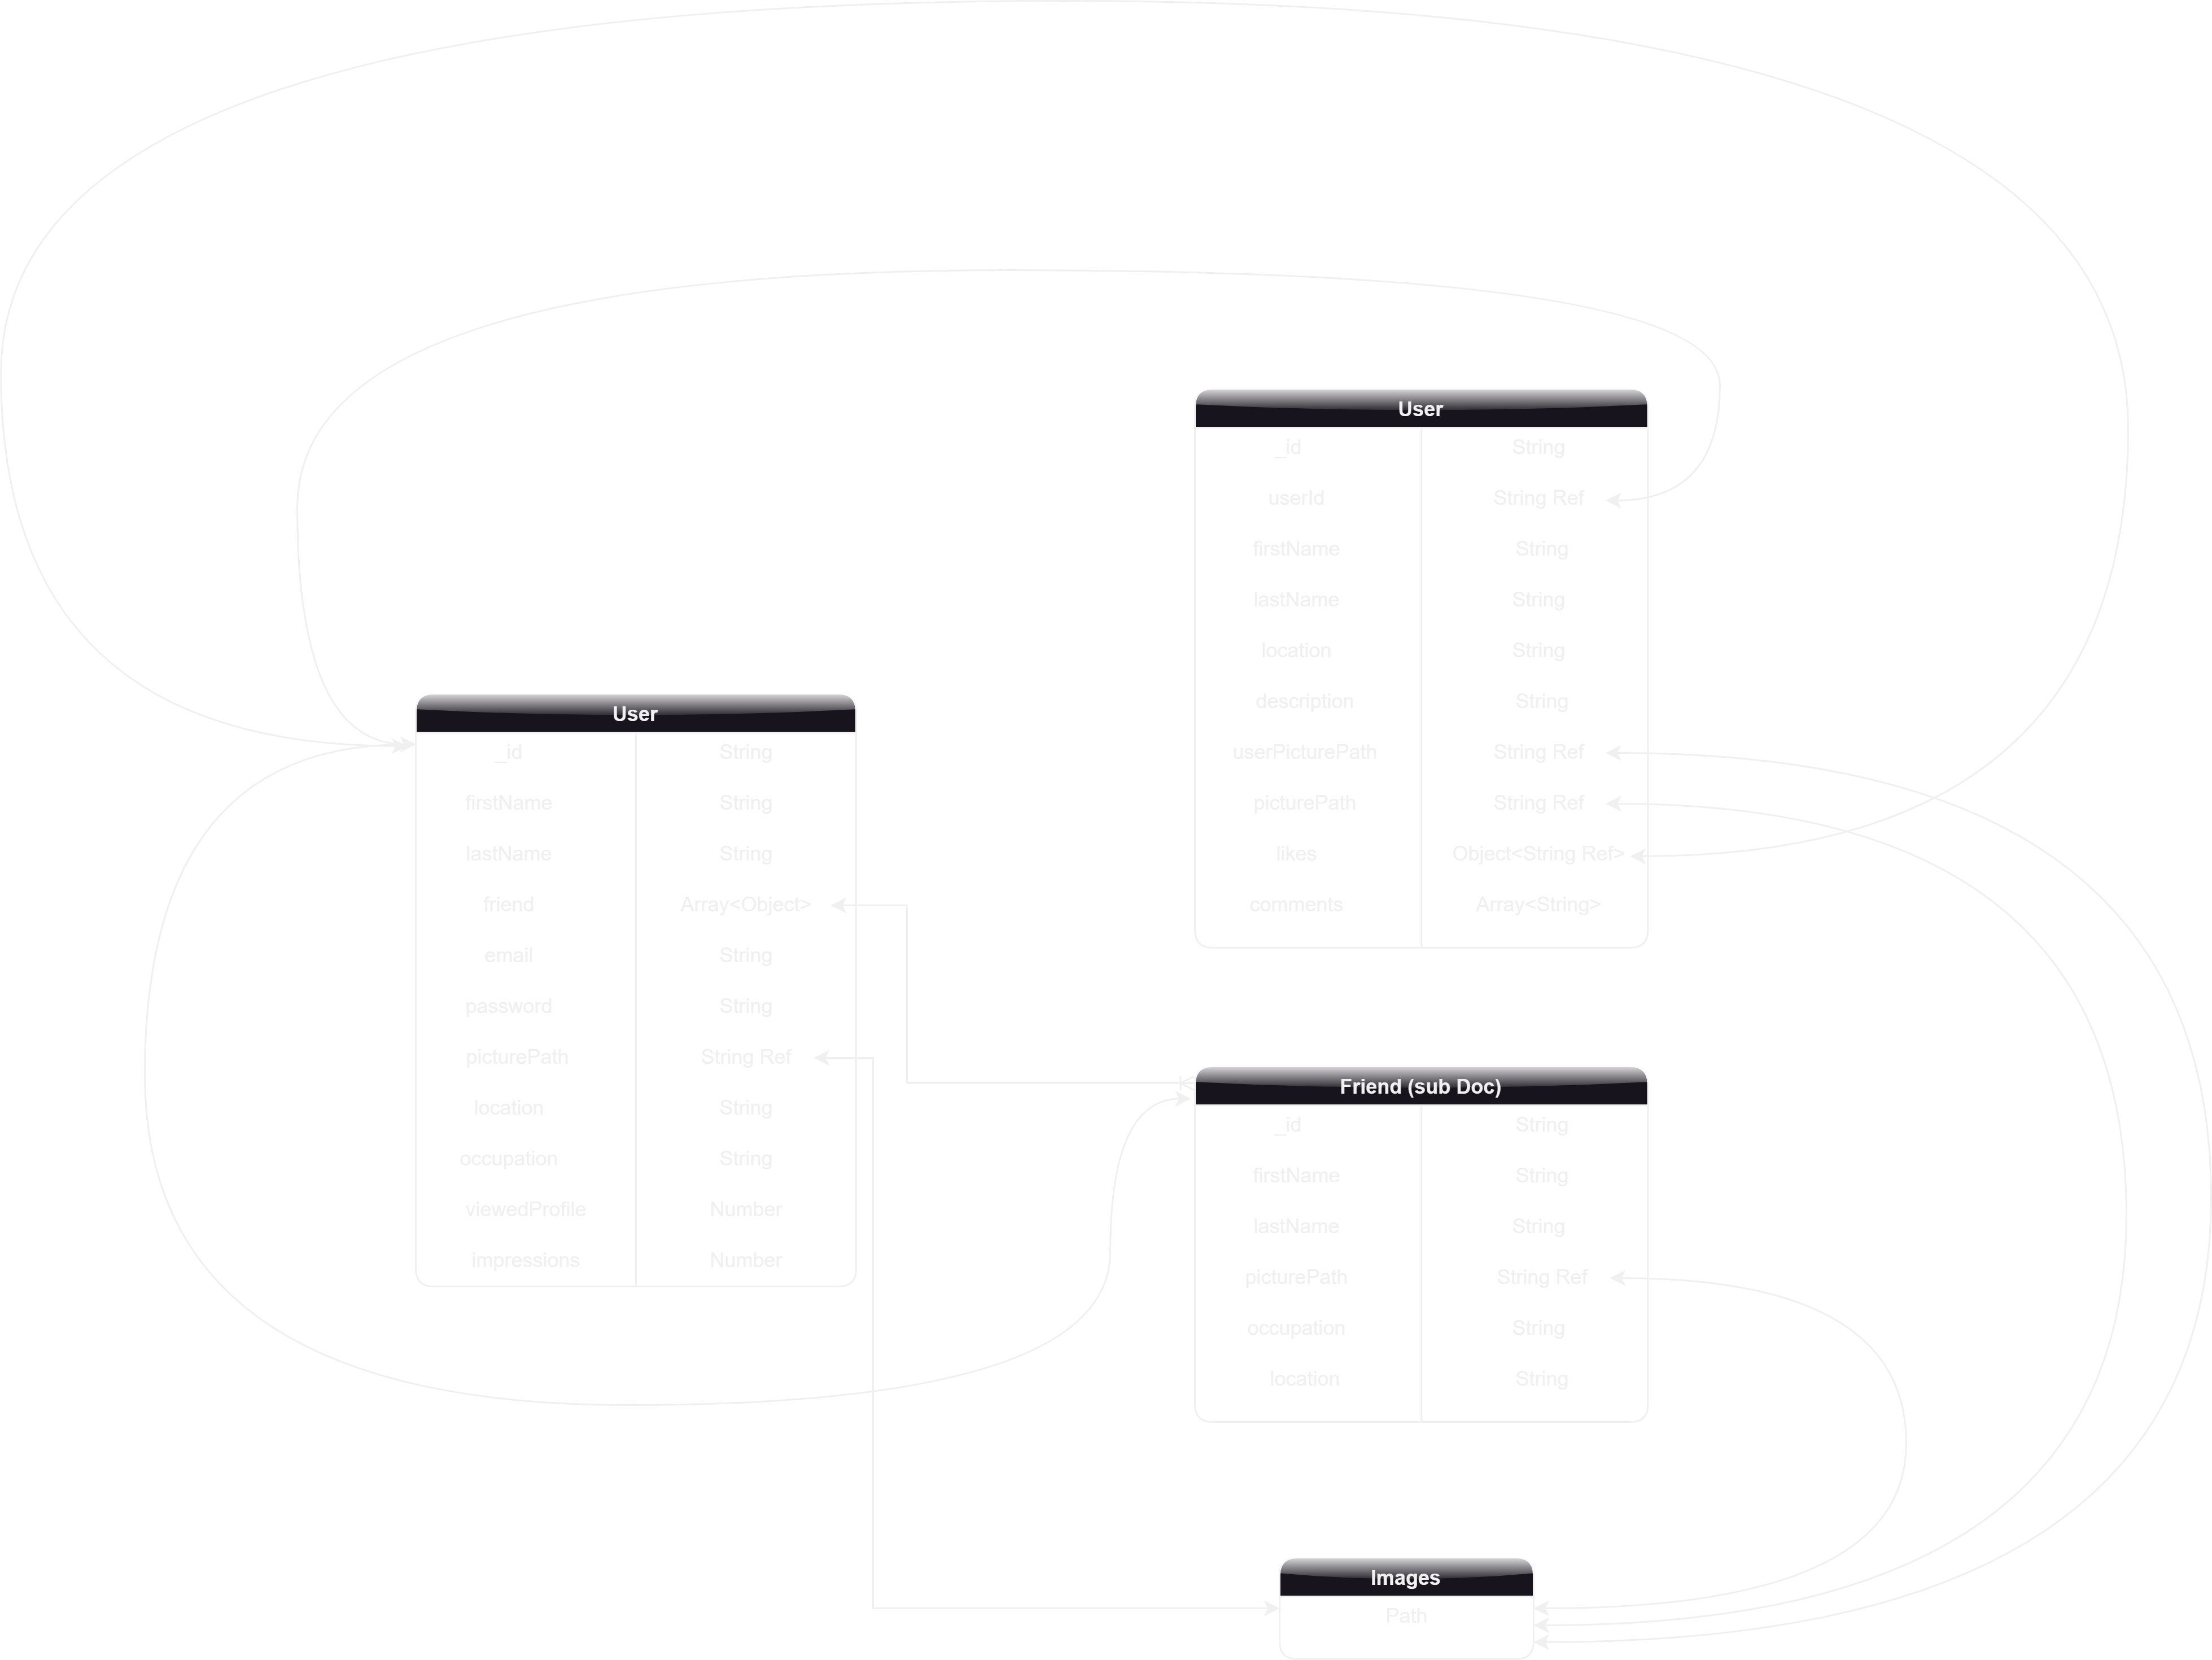
To get started, we need to navigate to the models folder in our directory and create a new file called post.js. We can refer back to our data model for guidance, which outlines all the properties that our post model should have.
The post model will have its own ID, which is generated by MongoDB, so we don't have to specify that ourselves. We also need to include the user ID of the person who posted it, along with their first name, last name, and location.
Next, we have the description of the post itself, as well as the path to the user's image and the picture URL. We also need to account for likes, which is a bit more complicated. We'll store the likes in an object, which will include a reference to who liked the post, represented as a Boolean value.
Finally, we have comments, which will be an array of strings. While it's possible to create a separate model for comments, complete with its own likes and replies, we're keeping it simple for now and just posting the comment as a string.
Data modeling can be tricky, so it's important to take your time and experiment. I'll show you how to set up both likes and comments in the post model, as these are the two most complicated aspects.
Overall, creating a post.js model is a crucial step in building a social media application. While it may seem daunting, once you have a solid understanding of data modeling, you'll be able to create complex applications with ease.
Change the image size by using the click-and-scroll function.
server
├── models
│ ├── Post.jsimport mongoose from "mongoose";
const postSchema = mongoose.Schema(
{
userId: {
type: String,
required: true,
},
firstName: {
type: String,
required: true,
},
lastName: {
type: String,
required: true,
},
location: String,
description: String,
picturePath: String,
userPicturePath: String,
likes: {
type: Map,
of: Boolean,
},
comments: {
type: Array,
default: [],
},
},
{ timestamps: true }
);
const Post = mongoose.model("Post", postSchema);
export default Post;
- The first line imports mongoose, which is a library that helps us connect to MongoDB and define schemas for our models.
import mongoose from "mongoose";- The second line creates a new schema object called postSchema, which defines the structure and validation rules for our post model. We pass in an object as the first argument, which contains all the properties and their types that we want our post model to have. We also pass in an option as the second argument, which sets timestamps to true. This will automatically add createdAt and updatedAt fields to our model.
const postSchema = mongoose.Schema(
  {
    // properties go here
  },
  { timestamps: true }
);- The next few lines define each property of our post model. For example, userId is a string that is required to be present. firstName and lastName are also strings that are required. location is a string that is optional. description and picturePath are also strings that are optional. userPicturePath is a string that is optional as well.
userId: {
  type: String,
  required: true,
},
firstName: {
  type: String,
  required: true,
},
lastName: {
  type: String,
  required: true,
},
location: String,
description: String,
picturePath: String,
userPicturePath: String,- The next line defines likes as a map of booleans. A map is a data structure that stores key-value pairs, where each key is unique and has an associated value. In this case, the keys are user IDs and the values are booleans indicating whether they liked the post or not.
likes: {
  type: Map,
  of: Boolean,
},- The last line defines comments as an array of strings. An array is a data structure that stores multiple values in an ordered sequence. In this case, each value is a string representing a comment on the post.
comments: {
  type: Array,
  default: [],
},- The final line creates a new model called Post using the postSchema we defined earlier and exports it for use in other files.
const Post = mongoose.model("Post", postSchema);

export default Post;